


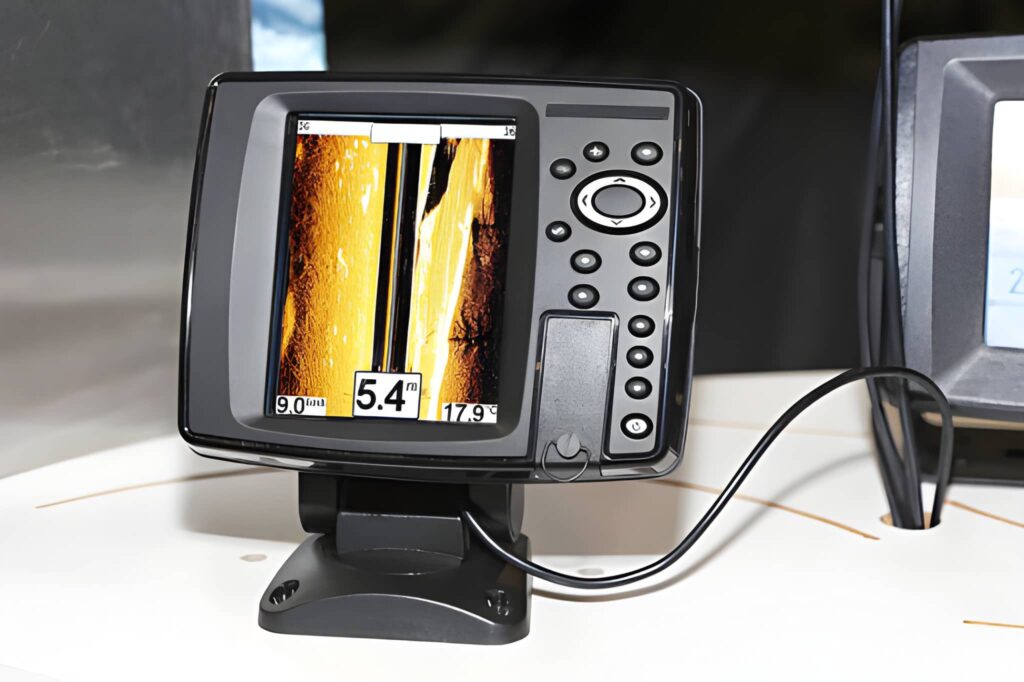
Installing a fish finder on a pontoon boat can dramatically enhance your time on the water. Beyond simply locating fish, a fish finder provides critical data on water depth, structure, and navigation hazards. However, pontoon boats pose unique challenges for installation due to their wide deck, dual pontoons, and non-traditional hulls. A successful installation requires careful planning, proper placement, and attention to both performance and safety.
Why Transducer Placement Matters More on Pontoons
The transducer is the component that collects sonar data from the water. On a pontoon boat, its placement is far more critical than on a traditional V-hull. Unlike a single hull, pontoons have multiple hulls, creating turbulence and areas of disturbed water that can distort sonar readings.
Placing the transducer on the rear bracket of a pontoon, slightly above the waterline, ensures it is in smooth water flow. Installing it too close to the back deck, the motor, or a livewell pump can generate bubbles or electrical interference that reduce signal clarity. For optimal performance, aim to mount the transducer on the starboard side if the captain’s chair is there, minimizing cable length and reducing bends in the wire that can degrade signal transmission.
Before drilling, observe how your pontoon sits in the water when fully loaded. A transducer that works perfectly on an empty boat may be too high when you add passengers and gear. Ideally, the transducer should remain submerged even under maximum load.
Choosing the Right Fish Finder for a Pontoon Setup
Not all fish finders are created equal for pontoon use. Larger screens may offer more detail, but smaller displays are often easier to mount on the confined console space of a pontoon. CHIRP sonar provides higher resolution for identifying fish in cluttered shallow water, while basic sonar may suffice for casual fishing. GPS and mapping are invaluable for remembering hot spots, especially if you fish in unfamiliar lakes.
Another consideration is the transducer type. While transom mounts are standard, trolling motor mounts can offer better positioning in certain setups, particularly if your rear pontoon has structural obstacles that interfere with straight sonar transmission. Through-hull transducers are less common on pontoons but provide unmatched accuracy for depth and structure detection.
Tools, Materials, and Cable Management
Pontoon installations often require materials not included in standard kits. The quality and type of your mounting hardware can impact both durability and signal performance. Stainless steel bolts resist corrosion in freshwater and saltwater environments. Rubber washers reduce vibration, preventing noise from distorting sonar readings. Protecting cables with plastic conduit or marine-grade tubing is essential; without it, vibration against aluminum edges can wear through insulation over time, causing intermittent signal loss or shorts.
A small table summarizes the essentials:
| Material | Purpose | Expert Tip |
|---|---|---|
| Stainless steel bolts & nuts | Secure transducer and monitor | Ensure bolts are not overtightened to avoid deforming aluminum |
| Rubber washers | Reduce vibration and prevent scratches | Double-layer washers for extra stability on larger monitors |
| Plastic conduit | Protect transducer cable | Run conduit along the smoothest path to prevent kinks |
| Marine-grade wire | Extend power connections if needed | Use wire rated for marine environments, not standard household wire |
| Electrical connectors | Fuse box or battery hookup | Crimp connectors carefully for secure contact |
| Silicone sealant | Waterproof drilled holes | Minimal amount; excess can interfere with mounting |
Mounting the Transducer: Beyond the Basics
Many installations fail because the transducer is mounted without considering water dynamics. On a pontoon, the rear bracket may seem ideal, but bubbles from the motor, turbulence from the dual pontoons, or water splashing from the deck can distort sonar readings.
The expert approach is to first test-fit the transducer in the intended location, then place the boat in the water partially loaded with gear and people. This ensures that when the boat is in normal operation, the transducer is submerged in smooth water flow. Angling it slightly forward helps avoid cavitation, improving the accuracy of the sonar returns.
Routing Cables: Long-Term Reliability
Pontoon boats have wide decks and multiple pontoons, creating long cable runs that can rub against sharp edges. Running the transducer cable through plastic conduit is essential. Avoid tight bends and areas where water might pool or freeze, as repeated stress can fracture the cable insulation.
When routing cables to the monitor, keep them away from other electrical devices or pumps that could create interference. Some experienced pontoon owners also recommend running the cable inside a foam sleeve to reduce vibration and dampen electrical noise, which can improve sonar clarity in turbulent waters.
Monitor Installation: Ergonomics and Visibility
The monitor must be placed where it is easily viewable from the captain’s seat while remaining accessible for adjustments. Test multiple positions before drilling, considering glare from the sun and potential obstacles like gauges or control knobs. Drilling should be gradual; fiberglass cracks easily under stress. Rubber washers between the monitor bracket and console reduce vibrations and protect the console from scratches.
Consider leaving enough space behind the monitor for cable routing and future upgrades. Many pontoons benefit from a slight offset to avoid reflections from metallic surfaces, which can create interference or reduce screen visibility in sunlight.
Power Connections: Safety First
Connecting your fish finder to a reliable power source is crucial. If your console has a fuse box with empty accessory slots, tapping into these is safer and keeps wiring neat. If you must connect directly to the battery, use marine-grade wire and proper crimped connectors. Always observe polarity and disconnect the battery before handling connections.
An expert tip is to add an in-line fuse near the power source to protect the fish finder from voltage spikes. This small step prevents damage to the expensive electronics and ensures long-term reliability.
Testing and Fine-Tuning
Once installed, power on the fish finder and allow it to acquire GPS and sonar signals. Observe the sonar returns for clarity, checking for any distortion or interference. If the readings are noisy or inconsistent, re-evaluate transducer placement and cable routing. Minor adjustments, such as rotating the transducer slightly or moving cables further from pumps, can make a significant difference in sonar accuracy.
Advanced Tips for Pontoon Owners
Experienced pontoon boaters recommend additional steps to maximize fish finder performance. Installing protective covers on the monitor extends screen life and prevents sun damage. Using cable management clips prevents accidental snagging or wear. Some pontoons benefit from angling the transducer slightly inward toward the boat’s centerline to reduce side turbulence effects.
Planning for future upgrades during the installation makes it easier to replace monitors or transducers without disassembling the entire setup. Documenting cable runs and mounting locations is also valuable for troubleshooting years later.
Troubleshooting Common Issues
Common issues include no signal, interference, and inaccurate depth readings. Solutions often involve verifying transducer angle, ensuring proper submersion, and keeping cables away from sources of electrical noise. Regular maintenance, such as checking for loose connections or damaged wires, ensures reliable performance over the long term.
FAQ: Fish Finder Installation on Pontoon Boats
Technically, yes, but it is not recommended. A longer cable run can reduce signal strength and increase the likelihood of interference. Additionally, mounting on the opposite pontoon may expose the transducer to turbulence from the dual hulls, which can compromise sonar accuracy.
The transducer should always be submerged in clean, undisturbed water. For most pontoon setups, this means it should remain just below the waterline even when the boat is fully loaded. Too deep, and it may hit submerged obstacles; too shallow, and air bubbles can interfere with sonar readings.
Most pontoon owners can install a fish finder themselves if they follow the instructions carefully and handle the electrical connections safely. However, if you have no experience with marine electrical systems or fuse setups, consulting an experienced installer is advisable. Using an in-line fuse and properly shielded cables increases safety for DIY installations.
Pontoon-specific factors can affect performance, such as turbulence along the pontoons or motor-generated bubbles. Minor adjustments to transducer angle or position can significantly improve accuracy. Tilting the transducer slightly forward or toward the centerline of the boat can help reduce turbulence effects.
Use plastic conduit or flexible tubing along all edges and corners. Avoid tight bends and loose cable sections. Cable management clips under the console help keep wires secure. Regularly inspect for wear, especially in high-vibration areas or where exposure to water and UV is common.
Yes, but when installing the initial system, plan for enough space behind the console and access for cables. Documenting cable runs and mounting points will make future upgrades easier without needing to dismantle the installation.
Conclusion
Installing a fish finder on your pontoon boat requires careful planning and attention to pontoon-specific challenges, like turbulence and dual hull interference. By choosing the right device, positioning the transducer properly, and protecting cables and connections, you ensure accurate readings and long-lasting performance.
A well-thought-out installation not only improves your fishing success but also makes your time on the water safer and more enjoyable. With these best practices, your pontoon becomes a reliable, precision fishing platform for years to come.